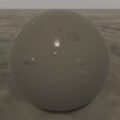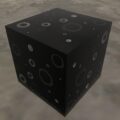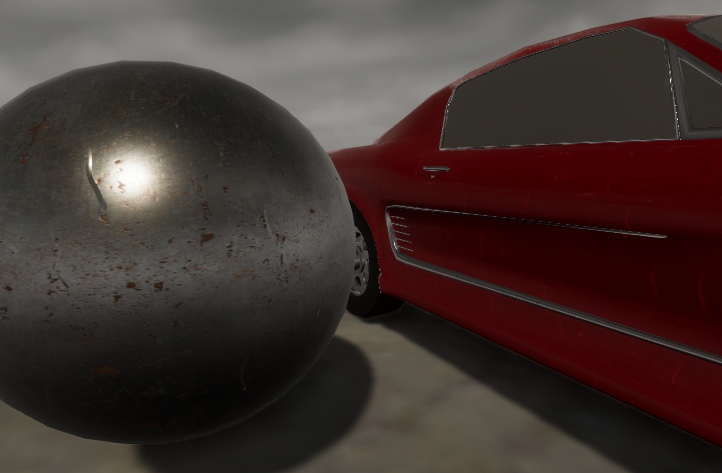
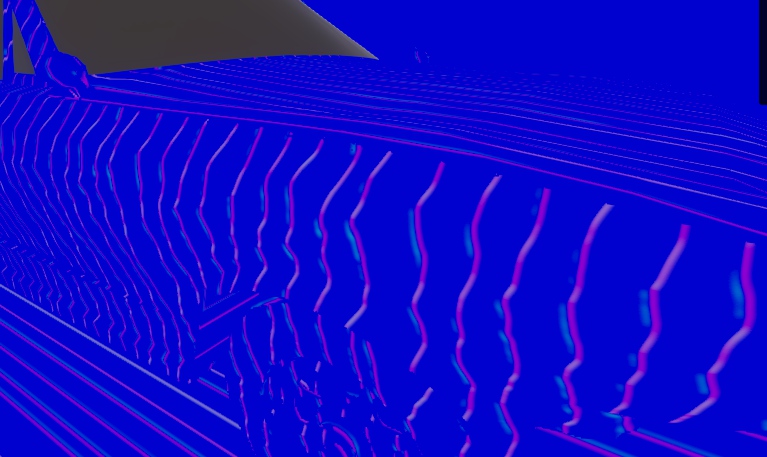
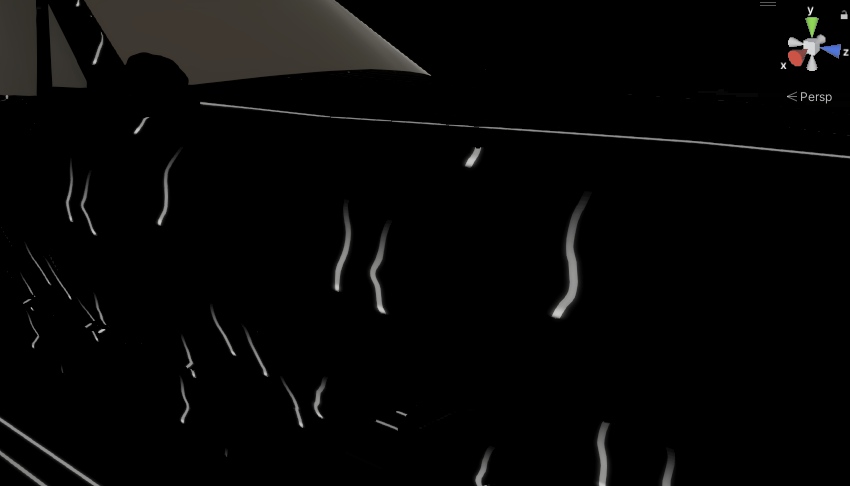
カスタムパスを使って、ノーマルバッファに法線とラフネスのデータを書き込み、不透明マテリアルの表面に雨が流れるエフェクトを追加してみました。
参考:https://github.com/alelievr/HDRP-Custom-Passes#screen-space-wetness
カスタムパスを作る
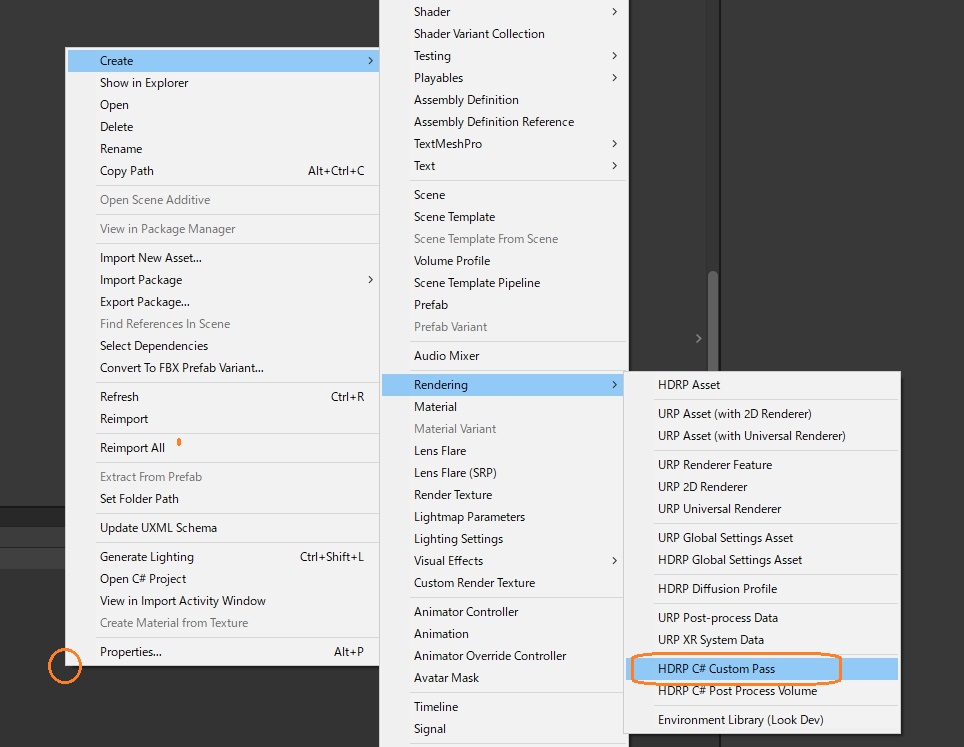
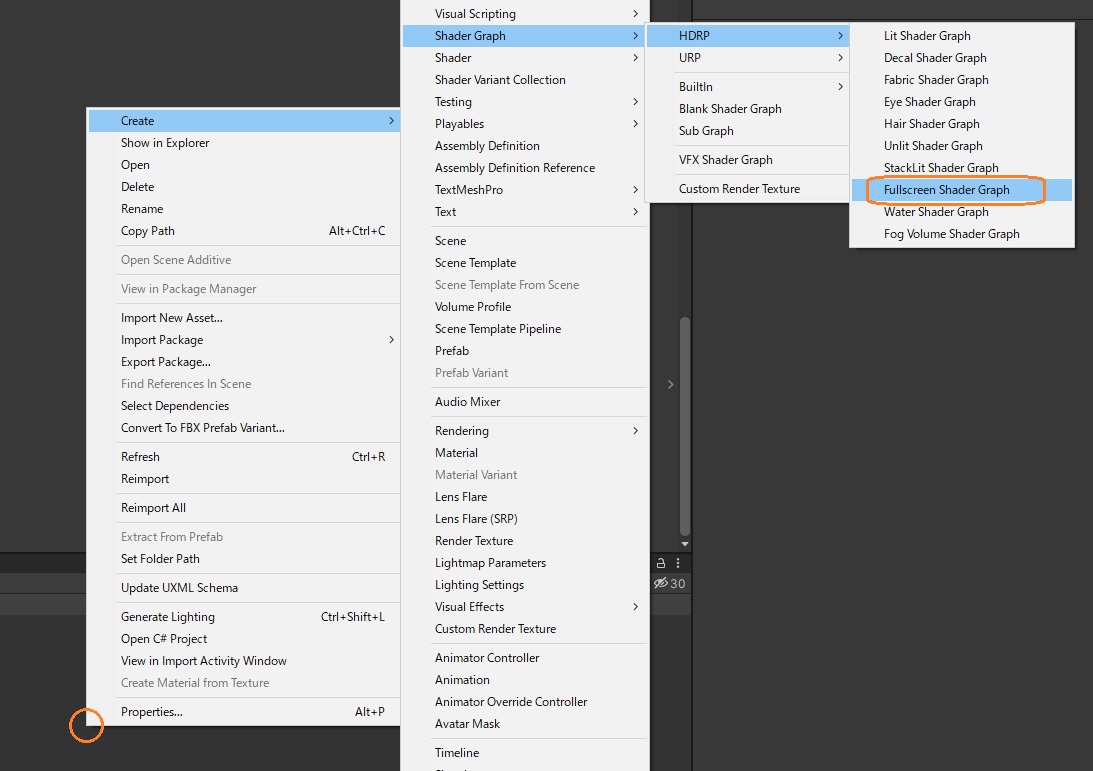
Projectウィンドウで「HDRP C# Custom Pass」を新規作成します。
カスタムパスでは、ノーマルとラフネスをレンダーテクスチャに描画して、レンダーテクスチャをノーマルバッファにコピーすることで書き込みを行います。
using UnityEngine;
using UnityEngine.Rendering.HighDefinition;
using UnityEngine.Rendering;
using UnityEngine.Experimental.Rendering;

class ScreenSpaceWetness : CustomPass
{
    public Material wetnessMaterial;
    RTHandle tmpNormalBuffer;

    protected override void Setup(ScriptableRenderContext renderContext, CommandBuffer cmd)
    {
        // RTHandleを割り当て
        tmpNormalBuffer = RTHandles.Alloc(Vector2.one, TextureXR.slices, dimension: TextureXR.dimension, colorFormat: GraphicsFormat.R16G16B16A16_SFloat, useDynamicScale: true, name: "TMP Normal Buffer");
    }

    protected override void Execute(CustomPassContext ctx)
    {
        // インジェクションポイントを確認
        if (injectionPoint != CustomPassInjectionPoint.AfterOpaqueDepthAndNormal)
        {
            Debug.LogError("Custom Pass ScreenSpaceWetness needs to be used at the injection point AfterOpaqueDepthAndNormal.");
            return;
        }

        // マテリアルがないときは終了
        if (wetnessMaterial == null)
            return;

        // レンダーターゲットを設定
        CoreUtils.SetRenderTarget(ctx.cmd, tmpNormalBuffer, ctx.cameraDepthBuffer);

        // レンダーテクスチャにノーマルとラフネスを描画
        CoreUtils.DrawFullScreen(ctx.cmd, wetnessMaterial, shaderPassId: 0);

        // ノーマルバッファにコピー
        CustomPassUtils.Copy(ctx, tmpNormalBuffer, ctx.cameraNormalBuffer);
    }
    protected override void Cleanup()
    {
        // RTHandleを解放
        tmpNormalBuffer.Release();
    }
}
SetUpメソッドで、レンダーテクスチャを管理するRTHandleを割り当てます。
    public Material wetnessMaterial;
    RTHandle tmpNormalBuffer;

    protected override void Setup(ScriptableRenderContext renderContext, CommandBuffer cmd)
    {
        // RTHandleを割り当て
        tmpNormalBuffer = RTHandles.Alloc(Vector2.one, TextureXR.slices, dimension: TextureXR.dimension, colorFormat: GraphicsFormat.R16G16B16A16_SFloat, useDynamicScale: true, name: "TMP Normal Buffer");
    }
Executeメソッドでは、まずインジェクションポイントを確認します。ノーマルバッファへの書き込みは「AfterOpaqueDepthAndNormal」のみ対応しています。
    protected override void Execute(CustomPassContext ctx)
    {
        // インジェクションポイントを確認
        if (injectionPoint != CustomPassInjectionPoint.AfterOpaqueDepthAndNormal)
        {
            Debug.LogError("Custom Pass ScreenSpaceWetness needs to be used at the injection point AfterOpaqueDepthAndNormal.");
            return;
        }
CoreUtils.SetRenderTargetメソッドでレンダーターゲットを設定します。カラーバッファにRTHancleを指定しています。
        // マテリアルがないときは終了
        if (wetnessMaterial == null)
            return;

        // レンダーターゲットを設定
        CoreUtils.SetRenderTarget(ctx.cmd, tmpNormalBuffer, ctx.cameraDepthBuffer);
CoreUtils.DrawFullScreenメソッドを使って、レンダーテクスチャにノーマルとラフネスを描画します。
CoreUtils.DrawFullScreen(ctx.cmd, wetnessMaterial, shaderPassId: 0);CustomPassUtils.Copyメソッドで、レンダーテクスチャをカメラノーマルバッファにコピーします。
CustomPassUtils.Copy(ctx, tmpNormalBuffer, ctx.cameraNormalBuffer);最後に、Cleanupメソッドの中でRTHandleを解放します。
    protected override void Cleanup()
    {
        // RTHandleを解放
        tmpNormalBuffer.Release();
    }
}
Custom Pass Volumeコンポーネント
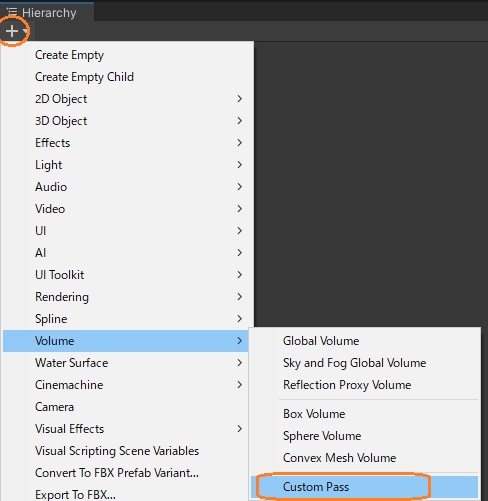
ヒエラルキーウィンドウでCustom Passオブジェクトを作成します。
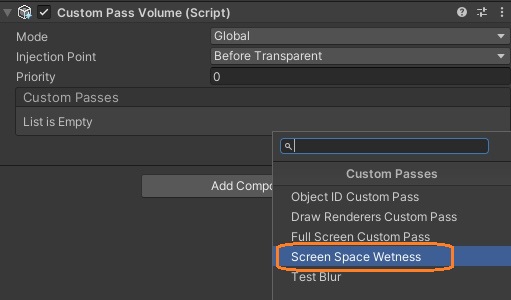
Custom Pass VolumeコンポーネントのCustom Passesの「+」ボタンを押します。
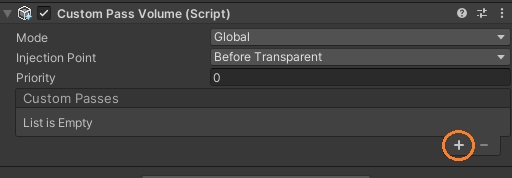
作成したカスタムパスが一覧に表示されるので、選択します。
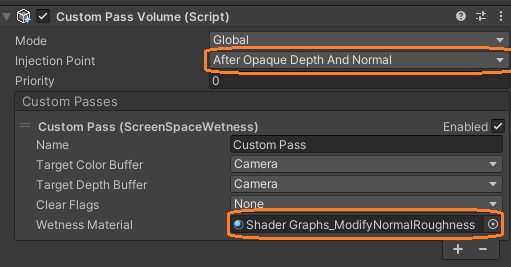
Injection Pointを「After Opaque Depth And Normal」にします。Wetness Materialにこの後作成するシェーダーグラフが設定されたマテリアルをアタッチします。
フルスクリーンシェーダーグラフ
レンダーテクスチャへの描画にはフルスクリーンシェーダーグラフを使っています。
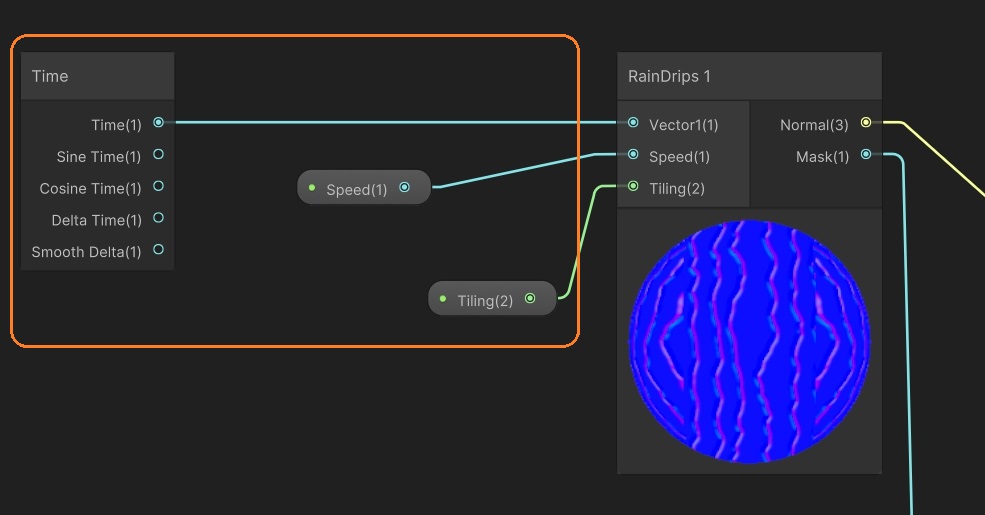
シェーダーグラフでは、シェーダーグラフで表面を流れる雨を作るで作ったサブグラフを修正して使います。

側面のマスクを取り除き、ノードの接続を少し変えて法線と雨のマスクを出力するようにしました。
マスクを使って、シーンの法線と合成します。
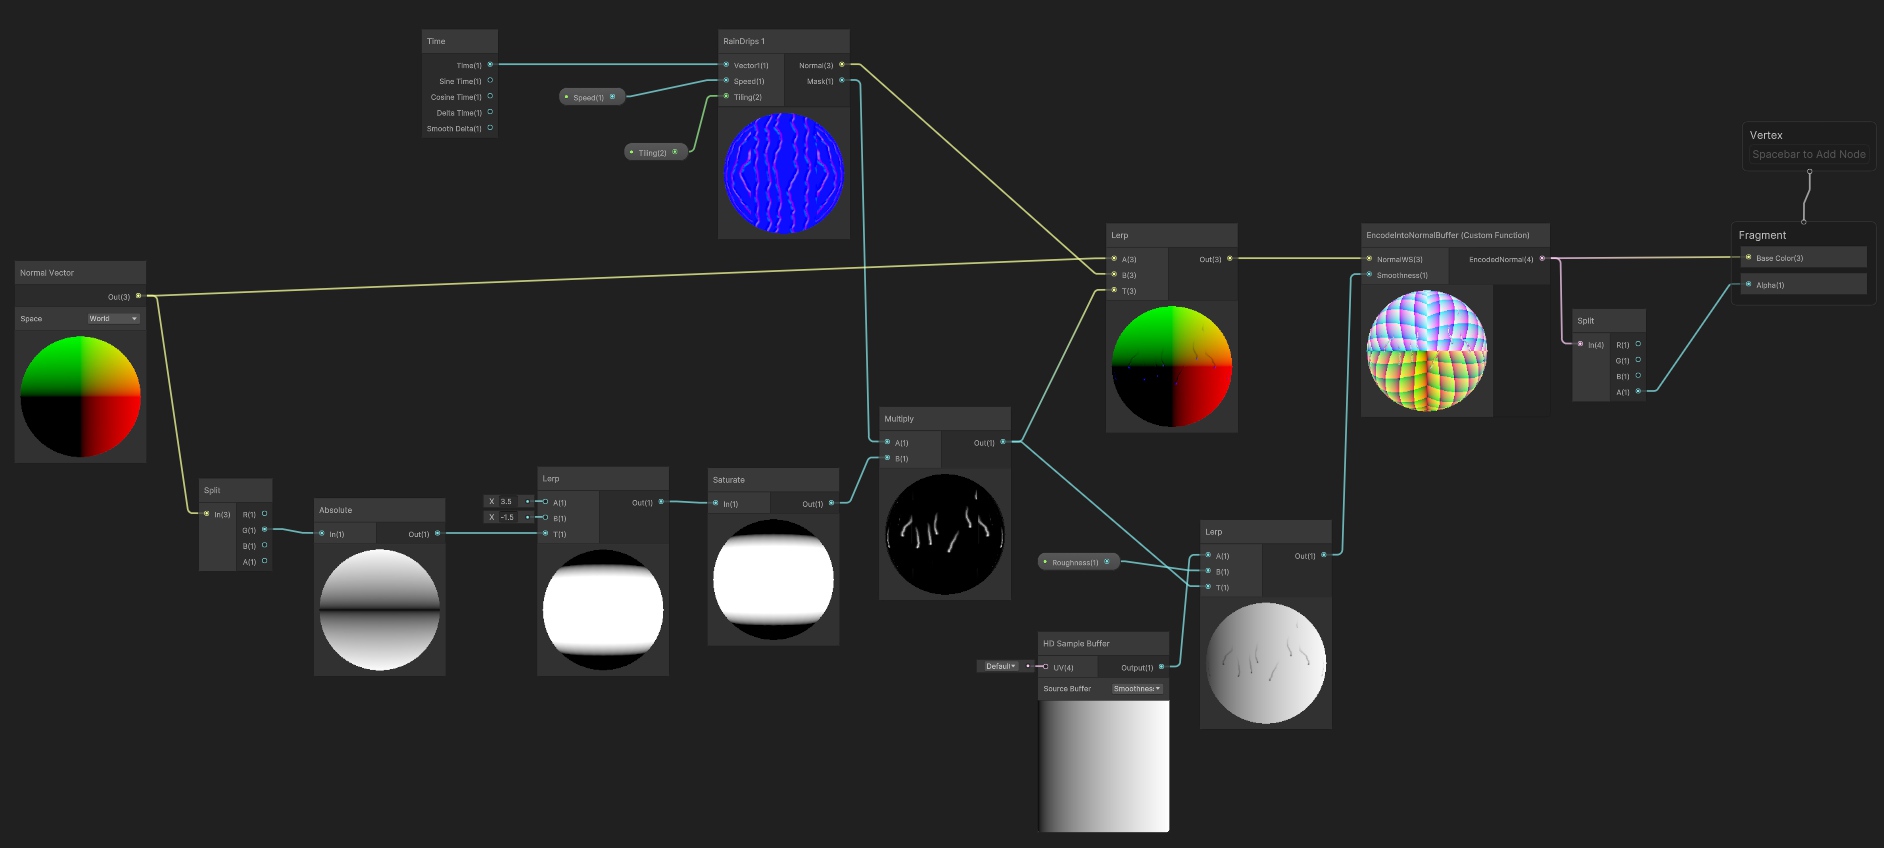
シェーダーグラフで、サブグラフにTimeノードやプロパティなど必要な値を入力します。
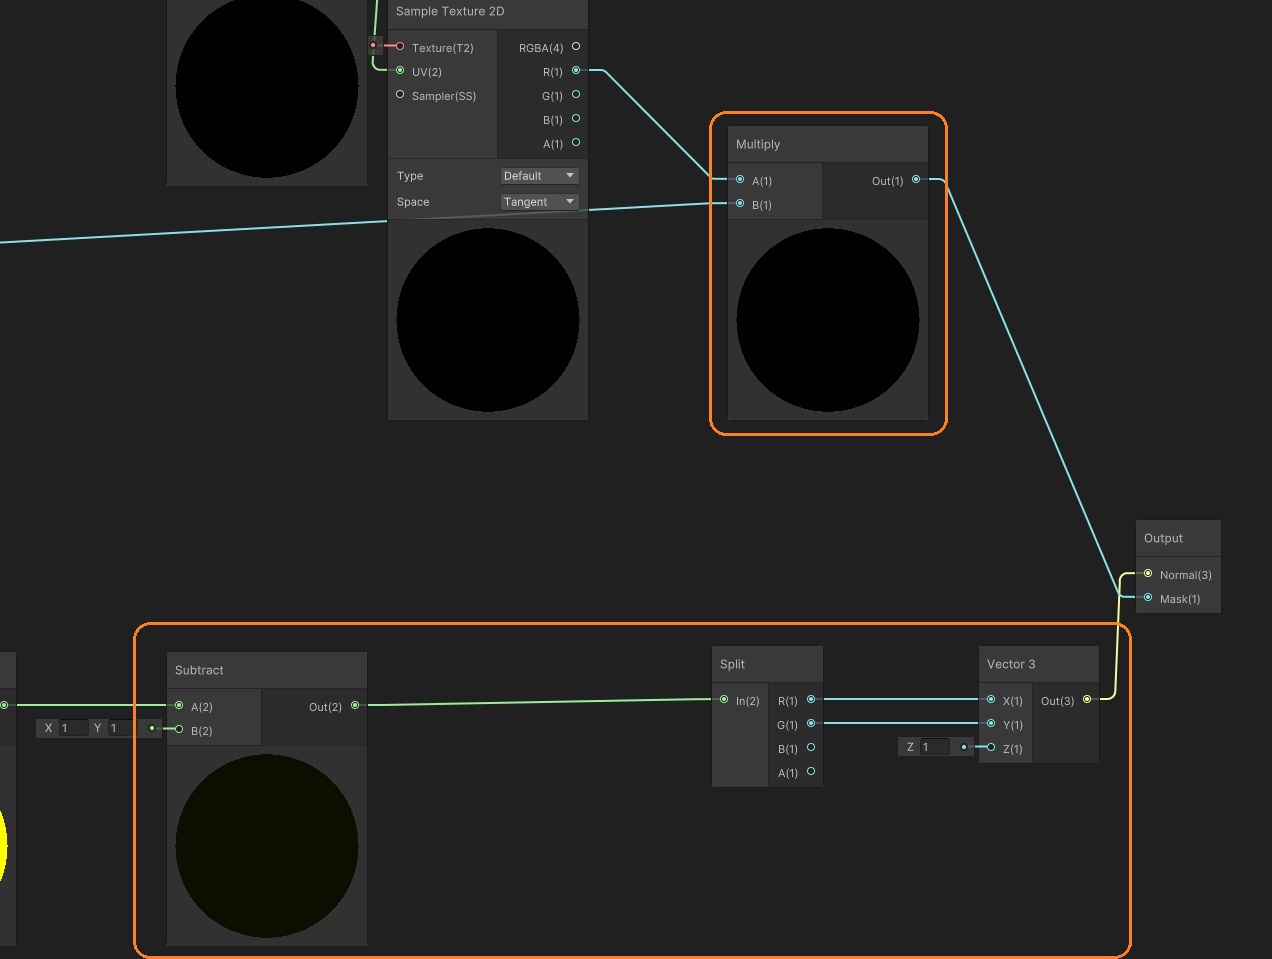
Lerpノードで、サブグラフの出力の法線と、Normal Vectorノードの出力を、サブグラフのマスクで補間します。
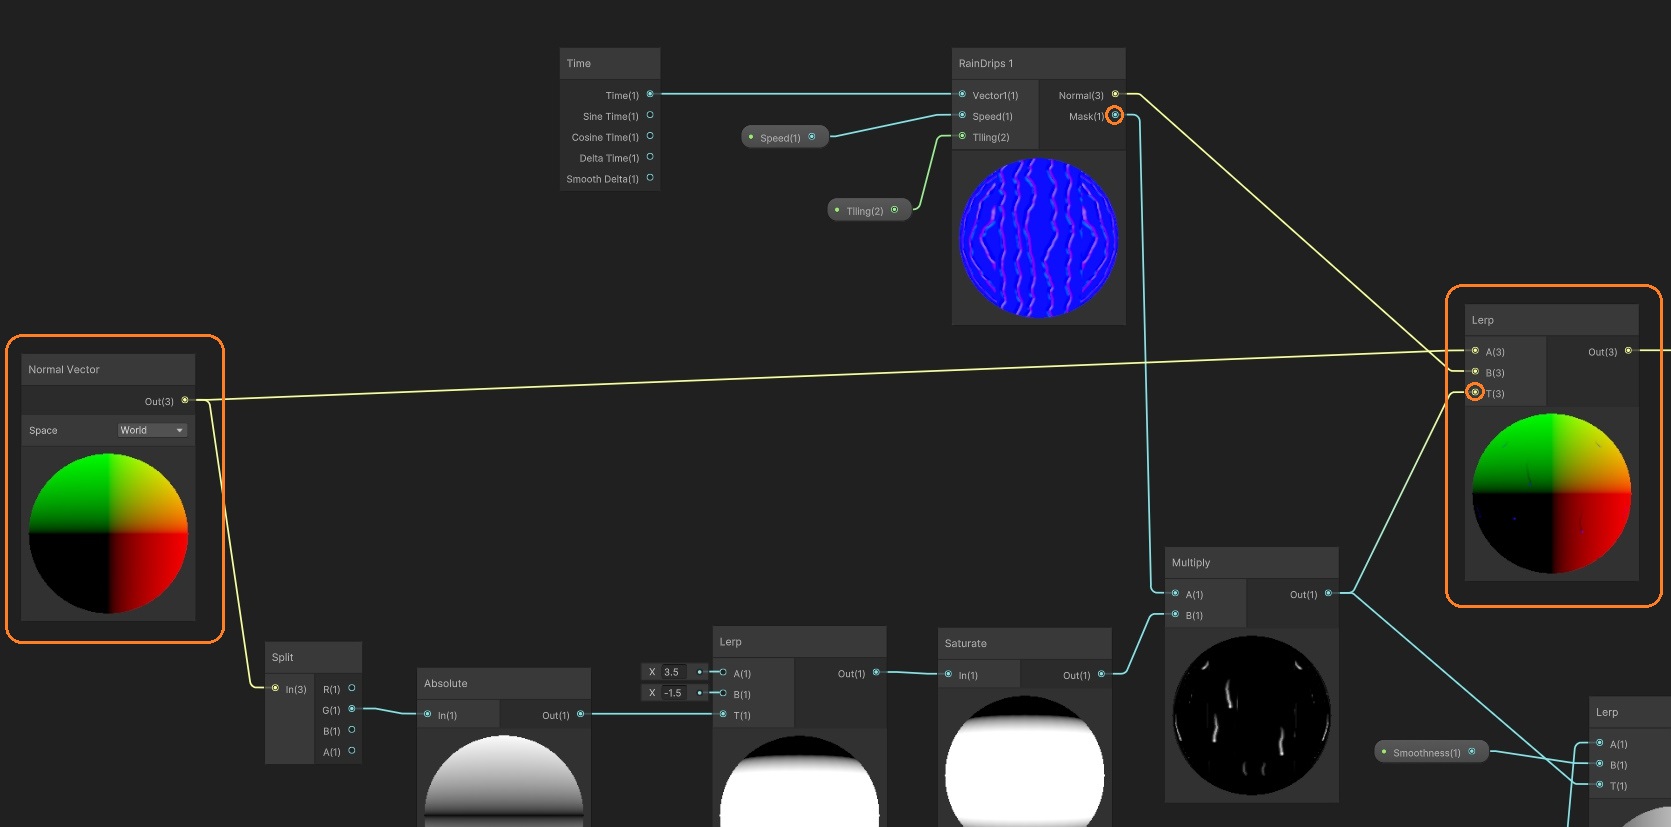
マスクには「Normal Vector」と「Absolute」「Lerp」ノードで作った値がかけ合わされています。この値は側面だけが白でそれ以外は黒になっています。
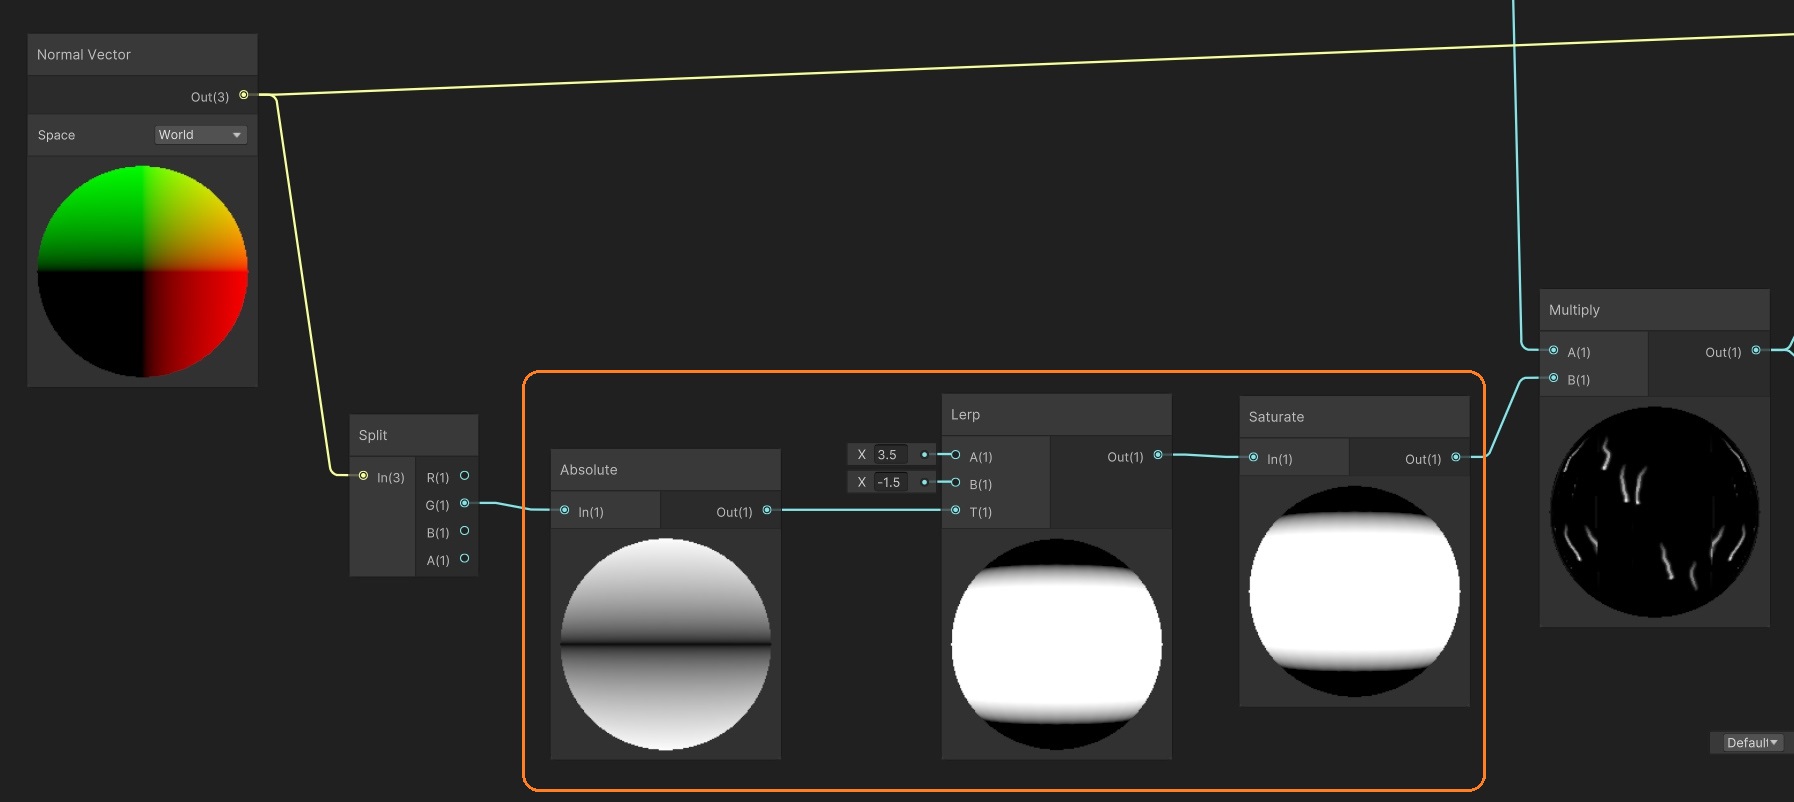
これによって、角度でエフェクトの強さが変わり、上下に向いた部分では雨が表示されなくなります。
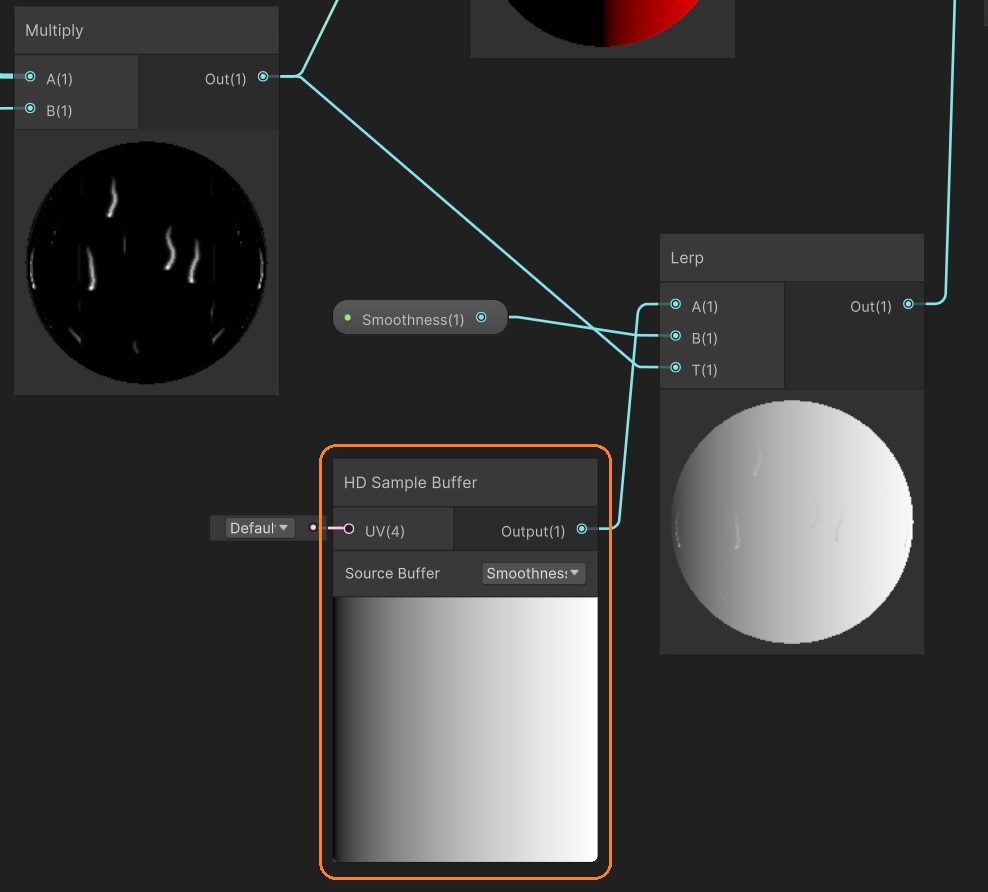
「HD Sample Buffer」ノードでシーンのスムーズネスを取得し、ノーマルと同様にLerpノードを使って雨の部分のスムーズネスと合成します。合成する値はインスペクタで設定します。
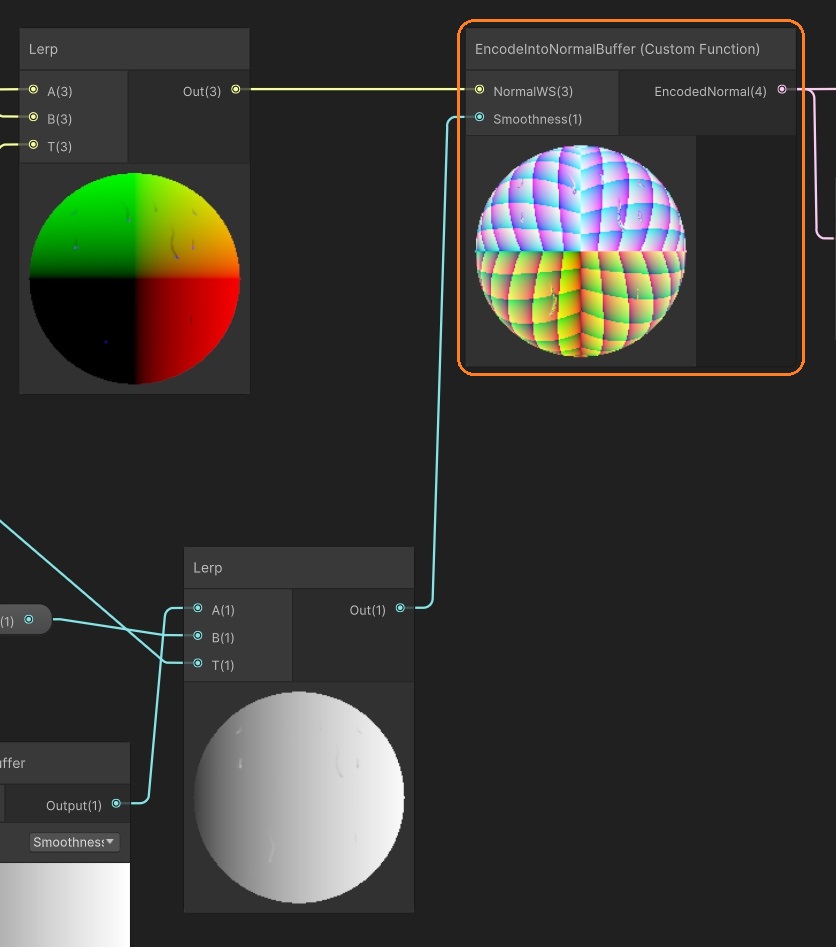
カスタムファンクションノードで、EncodeIntoNormalBufferメソッドを使います。
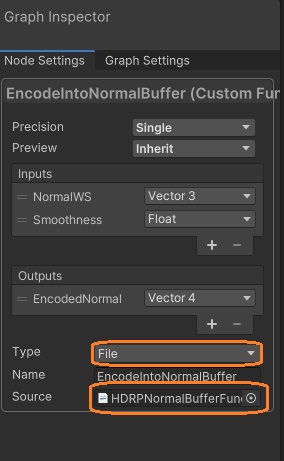
カスタムファンクションノードでは、精度の選択や入出力ポートの定義をします。今回はTypeを「File」にして、Sourceにhlslファイルをアタッチしました。
hlslファイルはWindowsエクスプローラーなどで作成します。Projectウィンドウで右クリックから「Show in Exploer」を選択するとその場所をエクスプローラーで開けます。
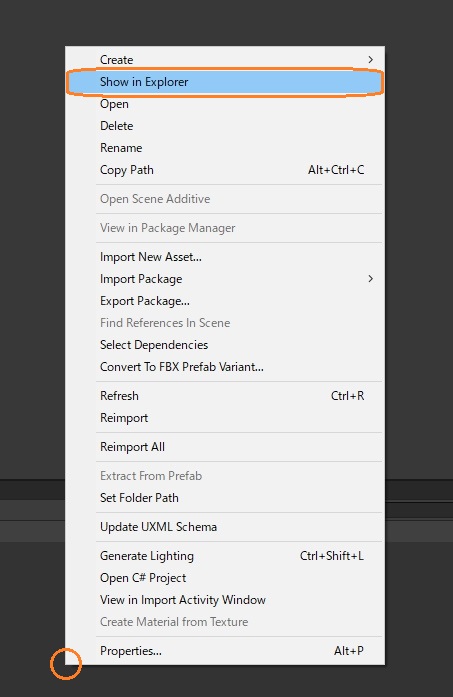
テキストファイルを新規作成して、拡張子を.hlslにします。これをProjectウィンドウからノードにドラッグアンドドロップします。

hlslファイルでは、EncodeIntoNormalBufferメソッドを使うために、includeディレクティブで、NormalBuffer.hlslを読み込みます。
#include "Packages/com.unity.render-pipelines.core/ShaderLibrary/Common.hlsl"
#include "Packages/com.unity.render-pipelines.high-definition/Runtime/ShaderLibrary/TextureXR.hlsl"
#include "Packages/com.unity.render-pipelines.high-definition/Runtime/Material/NormalBuffer.hlsl"


void EncodeIntoNormalBuffer_float(float3 normalWS, float smoothness, out float4 outNormalBuffer)
{
    NormalData normalData;
    normalData.normalWS = normalWS;
    normalData.perceptualRoughness = PerceptualSmoothnessToPerceptualRoughness(smoothness);

    EncodeIntoNormalBuffer(normalData, outNormalBuffer);
}
出力をマスタースタックに接続します。
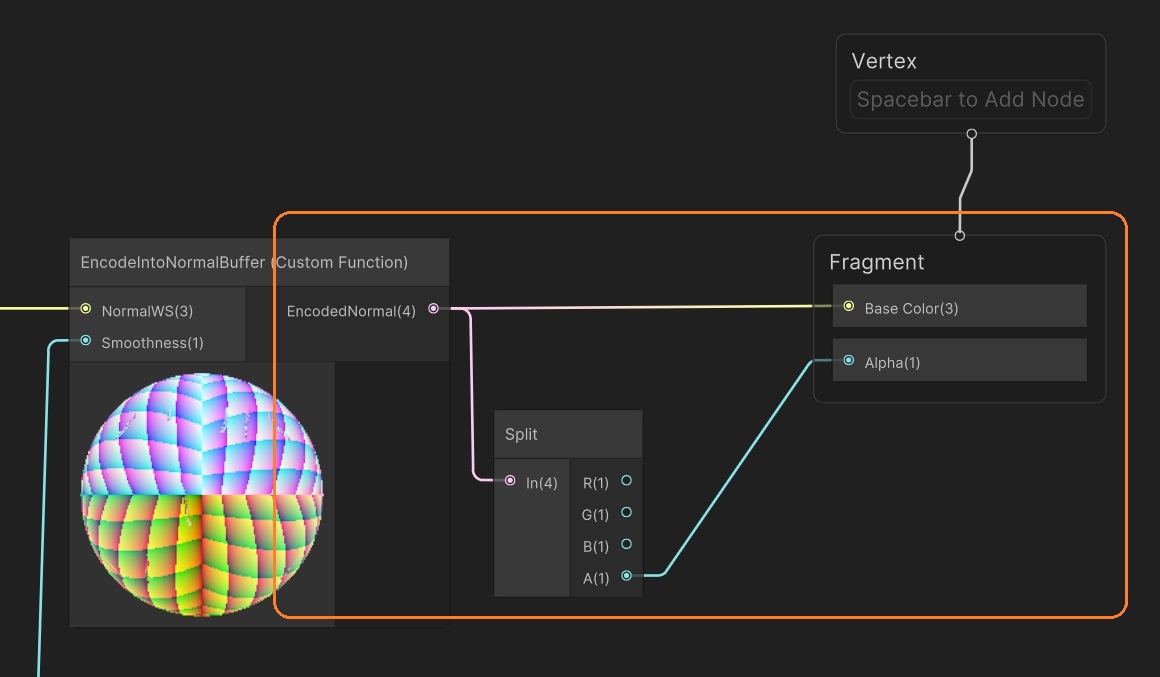
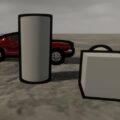
透明マテリアルにはエフェクトが表示されていません。