前の記事の方法でエージェントを配置するときに、ナビゲーションエリアを使って配置させたくないところのナビメッシュを削除しておきます。
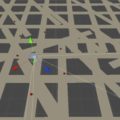
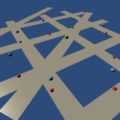
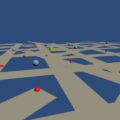
まずエージェントを配置するスクリプトを付けた空のゲームオブジェクトを中心として、4方向に地面としてPlaneオブジェクトを置きました。地面のStaticにチェックをいれて、ナビメッシュをベイクしスクリプトによってエージェントを配置します。
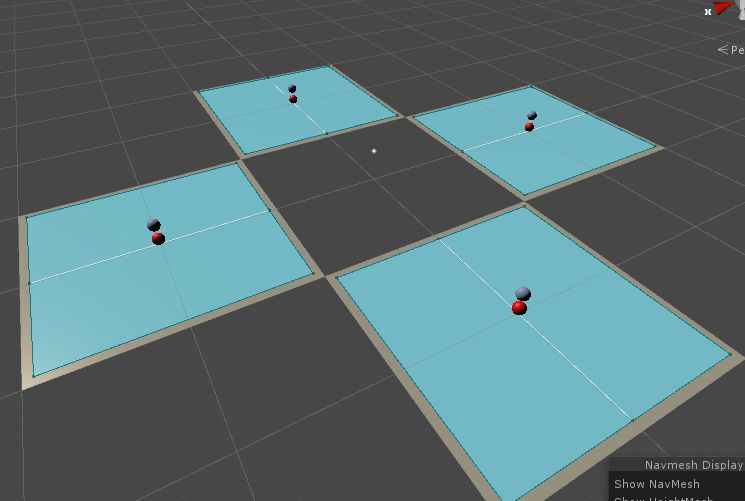
すると空のオブジェクトの4方向に青い球が作られて、ナビメッシュ上でそれに最も近い場所に赤い球のエージェントが作られます。
using System.Collections;
using System.Collections.Generic;
using UnityEngine;
using UnityEngine.AI;

public class GenerateAgentTest : MonoBehaviour
{
    [SerializeField] float dist = 15f;
    [SerializeField] GameObject sphere;
    [SerializeField] GameObject sphere2;


    // Start is called before the first frame update
    void Start()
    {

    }

    // Update is called once per frame
    void Update()
    {

        // 8方向のそれぞれの点から最も違い場所に配置
        if (Input.GetKeyDown(KeyCode.Q))
        {
            NavMeshHit hit2;

            // 前
            Instantiate(sphere2, transform.forward * dist + transform.position, sphere.transform.rotation);
            if (NavMesh.SamplePosition(transform.forward * dist + transform.position, out hit2, 30f, NavMesh.AllAreas))
            {
                Instantiate(sphere, hit2.position, sphere.transform.rotation);
            }

            // 右
            Instantiate(sphere2, transform.right * dist + transform.position, sphere.transform.rotation);
            if (NavMesh.SamplePosition(transform.right * dist + transform.position, out hit2, 30f, NavMesh.AllAreas))
            {
                Instantiate(sphere, hit2.position, sphere.transform.rotation);
            }

            // 後ろ
            Instantiate(sphere2, -transform.forward * dist + transform.position, sphere.transform.rotation);
            if (NavMesh.SamplePosition(-transform.forward * dist + transform.position, out hit2, 30f, NavMesh.AllAreas))
            {
                Instantiate(sphere, hit2.position, sphere.transform.rotation);
            }

            // 左
            Instantiate(sphere2, -transform.right * dist + transform.position, sphere.transform.rotation);
            if (NavMesh.SamplePosition(-transform.right * dist + transform.position, out hit2, 30f, NavMesh.AllAreas))
            {
                Instantiate(sphere, hit2.position, sphere.transform.rotation);
            }

        }

    }
}
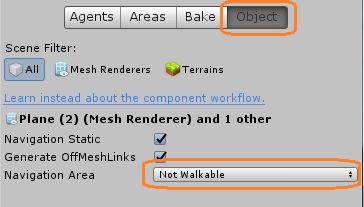
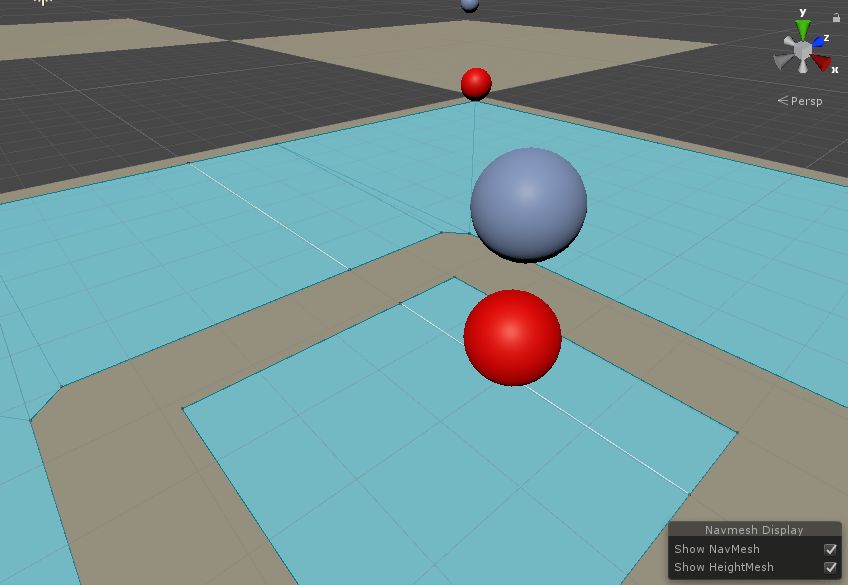
ここでナビメッシュを作りたくない地面を選択して、Navigationタブ -> Objectで、ナビゲーションエリアを「Not Walkable」にします。これはビルトインのエリアですが、ユーザーがカスタムタイプのエリアを定義することもできます。
そして再度ナビゲーションをベイクすると、シーンビューではこの地面のナビメッシュが消えます。再度エージェントを配置してみると、この地面の上には、青い球はあっても赤い球は配置されなくなります。
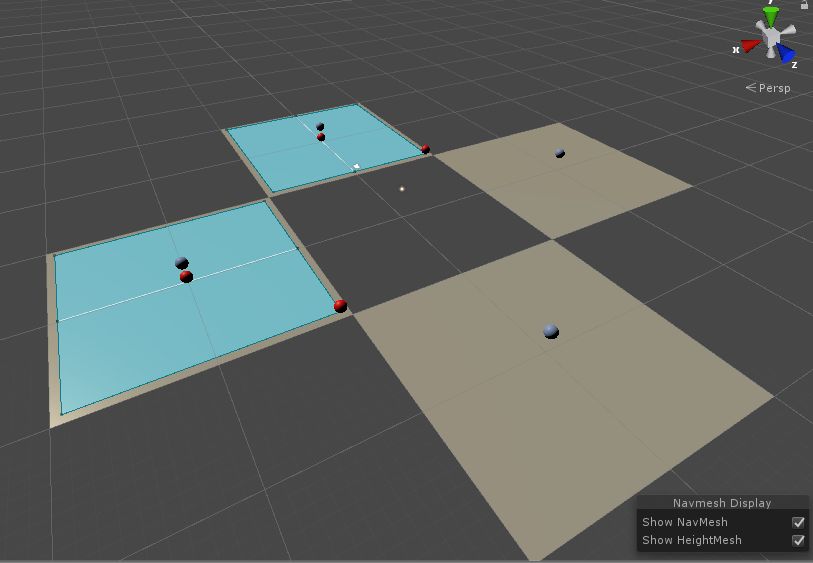
赤い球は最寄りのナビメッシュ上の点を探して別のPlaneオブジェクトの上に配置されました。
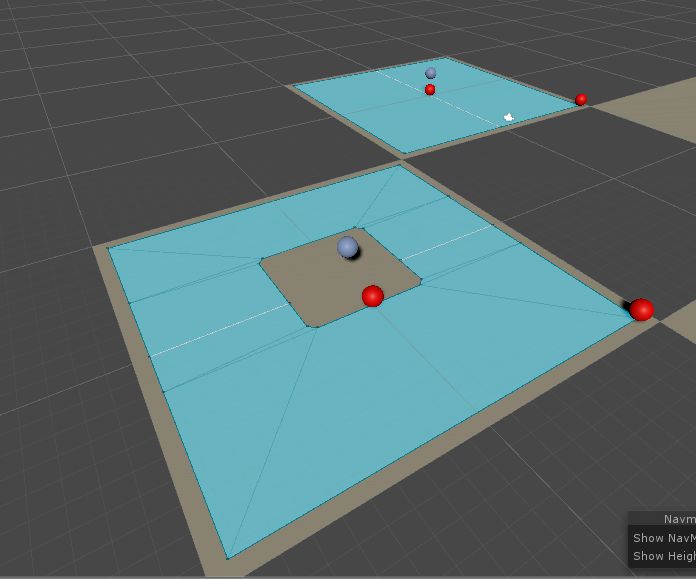
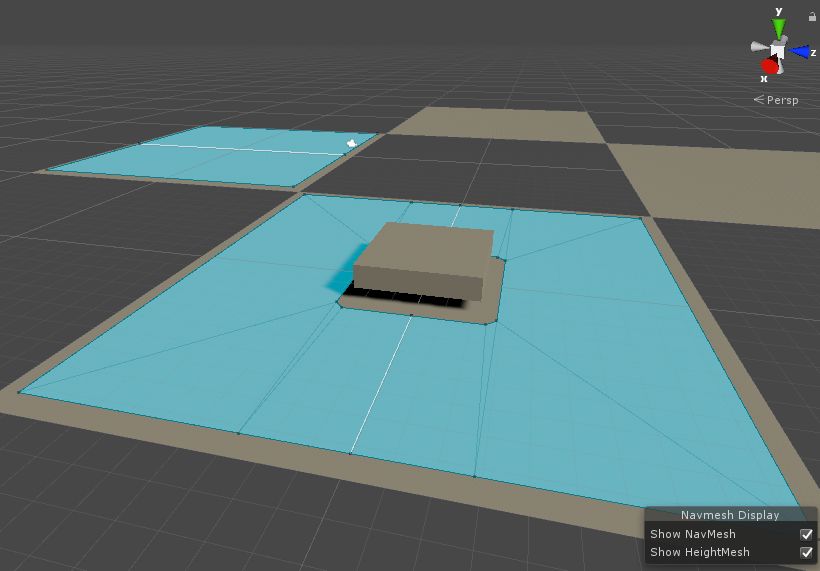
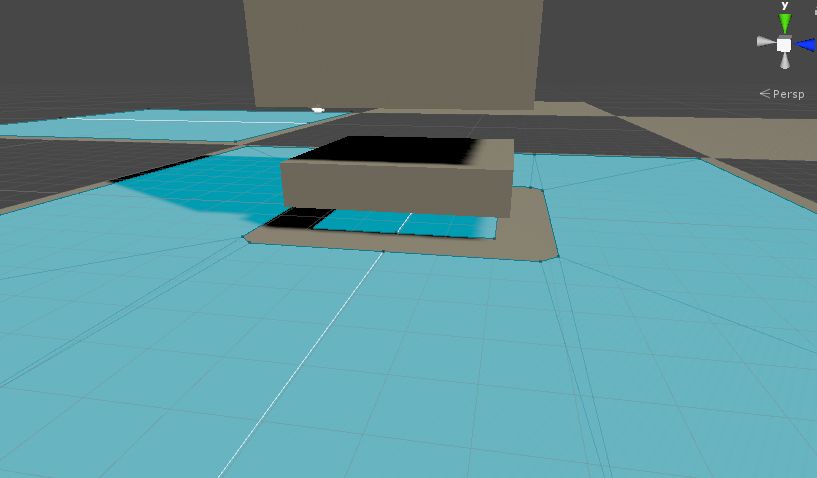
今度は、ナビメッシュがある地面の真ん中に、Staticにチェックを入れた大きめのCubeを置いてナビメッシュをベイクし、エージェントを配置してみます。すると、エージェントがこのCubeの内部に配置されてしまいました。(CubeもNot Walkableに設定して、Cubeの上にナビメッシュが作られないようにしています。)
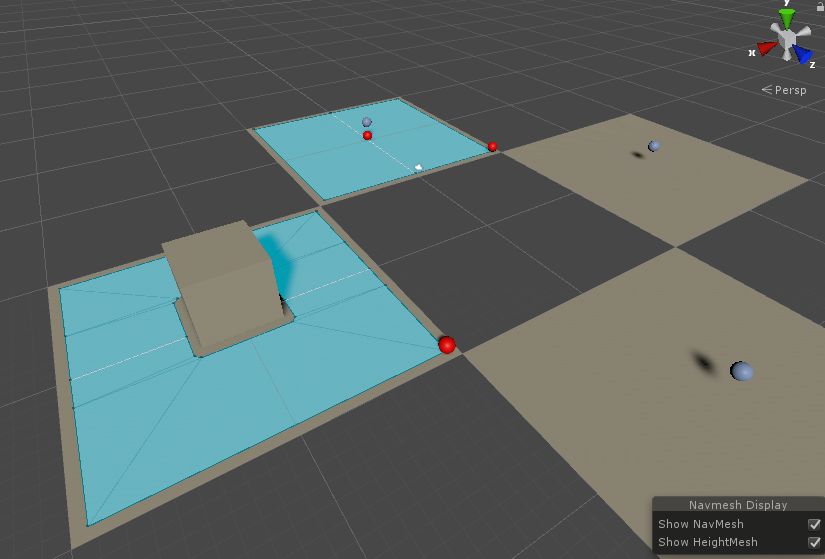
Cubeの内部の地面にもナビメッシュが作られてしまうようです。中に何もない建物や壁の内部に敵が湧いてしまうと困ります。
そこで、ナビメッシュを作りたくない部分にCubeなどのオブジェクトを置いて、ナビゲーションエリアを「Not Walkable」に設定してベイクしてみました。
すると、その下の部分にはナビメッシュが作られず、エージェントは大きなCubeの外側に配置されるようになりました。
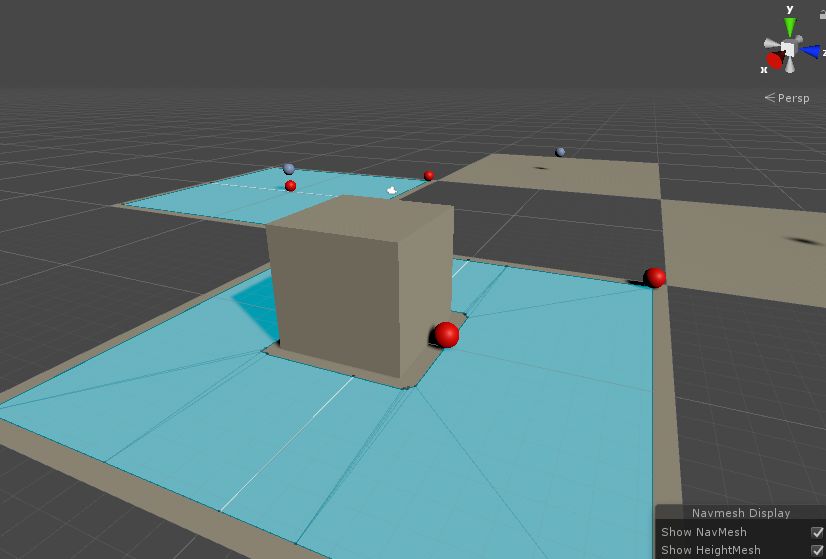
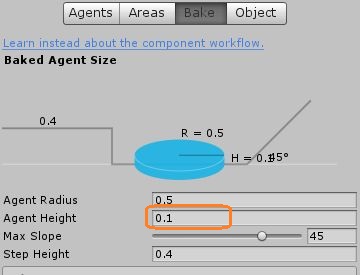
内側のCubeが地面から浮いている場合、エージェントの高さの値が小さいときは、その下にもナビメッシュが作られることがあります。
これでナビメッシュを部分的に削除して、ナビメッシュエージェントの湧く範囲を管理できそうです。